How To Do Eyebrow Extensions

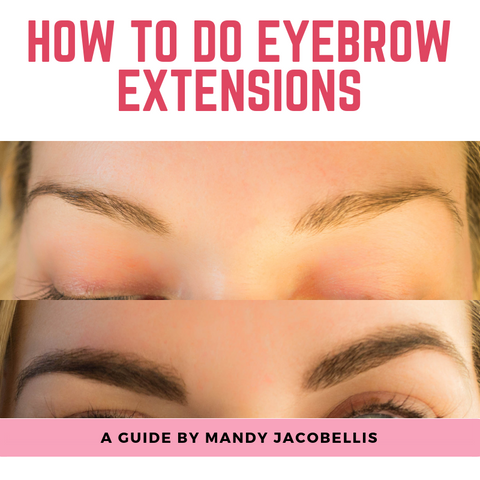
I LOVE doing eyebrow extensions. They are quick and WOW the before and afters are insane! Eyebrow extensions haven't yet become as well known as Microblading but to me they are an amazing alternative or addition. You can easily add this service to a lash service or brow service and it only takes about 30-60 minutes. Brow extensions are tiny brow hairs bonded to even the slightest peach fuzz to achieve a beautifully designed brow that is dimensional, matte and real looking. The results last about 3 weeks and can be added on top of a tint or microblading to add depth. Here is the how to:
New Video:
Original Video
If you can do classic eyelash extensions, you can do brow extensions
You will need:
* Brow trays in 5 shades to match clients hair
(each tray is .07 volume in an i curl and has 5-9mm brows)
* X-Tweezers (so you can flip the hair without twisting your arm)
* Tint (optional)
1. Start by cleaning the brow area with the LAshX Lash Cleanse or Protein Remover Wipes. This will remove natural oils without dehydrating the hair so you get the best bond possible
2. Decide on the shape you want. Here is where you would tweeze or wax if needed to make sure you are starting with a great base. Dont remove hair anywhere you may want to add an extension, just the outliers.
3. If the client only has peach fuzz or is very light you may want to tint the skin below the brows. This creates a drop shadow and give the brow more depth. You may or may not want to do this depending on the desired color and look. When doing the tint make sure the client likes the shape and or quickly use qtips to alter it for perfection.
4. You will place your brow tray with the logo facing you to the right of your client (unless you are left handed and then on left of client). Using the X-Tweezers grab one hair near the top of the brow and pull off to the side. Be careful to only pull away one hair or you will have some darker looking brow hairs.
5. Load the adhesive as you normally would with a classic lash application going as high up on the hair with adhesive as the natural brow length. Very little is needed, there should not be big drops of adhesive on the extension.
6. Roll your X-Tweezers over in your hand so that the curve of the brow hair is arching up like a mountain. You will place the extension directly on top of the hair you are applying to sliding back and forth until it catches. Use the sides of your tweezer to smooth any adhesive out.
I like to start near the nose angling straight up and then shift the hairs out and down as I come around the brow. You want to follow the clients natural lash pattern for the most part and you want to follow thier natural lash lengths for the most part. Remember to keep your top and bottom edges clean.
7. Apply starting at the bottom of the brow and get shorter extensions as you work into the brow so that they extensions have a clean straight line at the top of the eyebrow.
Maintenance is the same as classic lash extensions: no water 24 hours, no oils or glycols ever, use only powder makeup and a soft brush if needed with grow out. These last about 3-4 weeks depending on clients care. The hardest part is keeping the skin care off the brows.
I hope this adds another great service to your menu. Please feel free to call our lash line with any questions 1-888-lashxla!
Happy Brow Designing!


Comments
Comments